
12 Easy Printmaking Activities for Preschoolers
These simple printmaking activities for preschoolers use everyday materials to turn pressing, rolling, stamping, and texture play into open-ended art for ages 3–5.
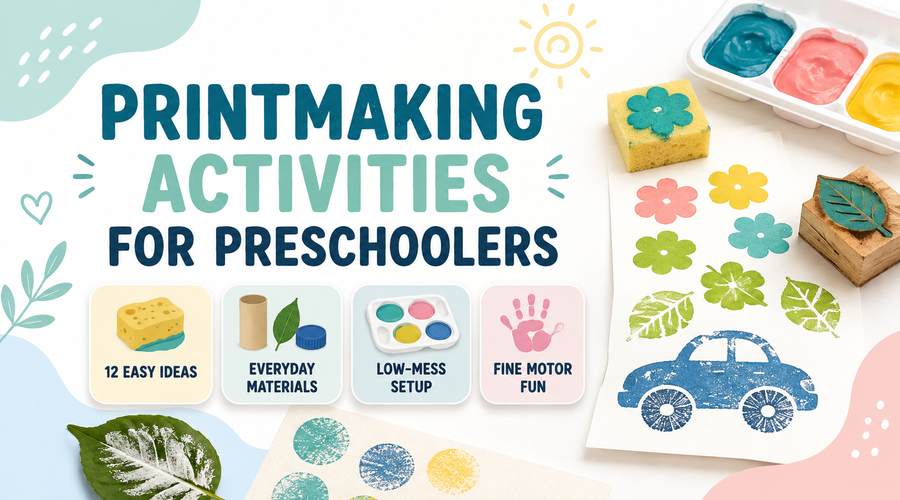
Quick answer: The easiest printmaking activities for preschoolers can be as simple as dipping a sponge, block, cardboard tube, leaf, or toy wheel into a thin layer of washable paint and pressing it onto paper. Start with large tools and one or two colors, then add patterns, symmetry, texture comparisons, and simple predictions as the child is ready.
Good preschool art does not need complicated directions or a perfect finished picture. Printmaking works especially well because children can see an immediate connection between an action and a mark: press, lift, look, change something, and try again.
That makes printmaking useful for more than a craft table. It can involve fine motor practice, early math language, sensory exploration, observation, and creative problem-solving. The National Association for the Education of Young Children (NAEYC) includes printing and stamping among open-ended process-art experiences for preschoolers and recommends giving children time and room to lead the exploration rather than copying an adult model.
What Is Printmaking for Preschoolers?
Printmaking means transferring color, shape, or texture from one surface to another. A child can press a painted sponge onto paper, roll a textured tube through paint, or make a leaf print. The basic idea stays the same: a tool carries paint and leaves a new mark.
For ages 3–5, the goal is not to teach formal printmaking techniques. The stronger learning opportunity is exploration. Children can compare marks, notice patterns, control pressure, mix colors, and decide what to try next.
This open-ended approach fits with NAEYC guidance on process-focused art for preschoolers , which emphasizes experimentation, time to explore, and child-led choices.
Printmaking Activities at a Glance
Use this chart to choose an activity based on a suggested starting age, preparation time, mess level, and the main skill involved. “Low mess” still assumes washable paint and adult supervision.
| Activity | Suggested Start | Prep | Mess | Main Skill |
|---|---|---|---|---|
| Sponge printing | 3+ | 2 min | Low | Grip + color |
| Block printing | 3+ | 2 min | Low | Shapes + patterns |
| Apple printing | 3+ | 5 min | Medium | Observation |
| Bubble wrap printing | 3+ | 3 min | Medium | Texture + pressure |
| Leaf printing | 3+ | 5 min | Medium | Nature observation |
| Foam shape printing | 4+ | 10 min | Medium | Patterns + planning |
| Easy monoprinting | 4+ | 5 min | Medium | Creative choices |
| Symmetry printing | 4+ | 3 min | Medium | Early math |
| Roller printing | 4+ | 5 min | Medium | Hand control |
| Cardboard tube printing | 3+ | 3 min | Low | Shape recognition |
| Toy car track printing | 3+ | 2 min | Medium | Cause and effect |
| Recycled texture printing | 3+ | 5 min | Medium | Sensory comparison |
Age note: These are editorial starting points, not developmental milestones. Adjust the tool size, number of steps, and supervision for the individual child and follow the age guidance on each art product.
12 Easy Printmaking Activities for Preschoolers
These printmaking activities for preschoolers are organized for quick setup and easy comparison. Start with one activity that matches the child’s attention span and hand control. Repeating a familiar activity with different colors, tools, or paper can be more useful than rushing through all 12.
1. Sponge Printing
You need: A large kitchen sponge cut into easy-to-hold pieces, washable paint, a shallow tray, and paper.
- Spread a thin layer of paint in the tray.
- Let the child press the sponge lightly into the paint.
- Press it onto paper, lift it straight up, and compare the mark.
- Try more or less pressure and notice what changes.
What children practice: Grasping, pressing, visual attention, and basic cause-and-effect thinking.
2. Building Block Printing
You need: Large washable plastic blocks, washable paint, a tray, and paper.
- Choose two or three blocks with clearly different bases.
- Dip only the bottom surface into a thin layer of paint.
- Stamp each block onto paper.
- Repeat a shape to make a simple AB or AAB pattern.
What children practice: Shape awareness, repetition, pattern language, and hand-eye coordination.
For more hands-on shape practice, pair this activity with shape activities for preschoolers . For a clean table follow-up, the free Preschool Shapes Tracing printable gives children a simple way to continue noticing and tracing shapes without more paint.
3. Apple Printing
You need: An apple cut by an adult, washable paint, a shallow tray, and sturdy paper.
- Cut one apple across the middle and another from top to bottom.
- Let children look at the two cut surfaces before adding paint.
- Dip the flat side into a thin layer of paint and press it onto paper.
- Compare the prints from the two cuts.
What children practice: Observation, comparison, vocabulary, and controlled pressing.
This is an easy extension for a fall theme or for apple activities for preschoolers .
4. Bubble Wrap Printing
You need: A small sheet of clean bubble wrap, washable paint, a paintbrush or sponge, and paper.
- Tape the bubble wrap to the table or wrap it around a cardboard tube.
- Apply a thin coat of paint to the raised bubbles.
- Press or roll it across paper.
- Try a second color after the first layer dries slightly.
What children practice: Texture awareness, pressure control, pattern recognition, and sensory language.
5. Leaf and Nature Printing
You need: Flat leaves or other natural items an adult has identified as appropriate for handling, washable paint, brushes, and paper.
- Collect a few leaves with clearly different shapes or vein patterns.
- Brush a light coat of paint onto one side.
- Place the painted side on paper and cover it with scrap paper.
- Press gently, remove the scrap paper, and lift the leaf.
What children practice: Nature observation, comparison, gentle hand pressure, and descriptive language.
6. Foam Shape Printing
You need: Large foam shapes, reusable blocks or cardboard handles, washable paint, and paper.
- Attach one foam shape to each handle.
- Offer only a few shapes at first.
- Let the child stamp freely, then invite them to repeat one or two shapes.
- Compare which shapes are easiest to recognize in the prints.
What children practice: Planning, pattern creation, shape recognition, and controlled placement.
7. Easy Monoprinting
You need: A smooth washable tray or laminated surface, washable paint, a wide brush or sponge, and paper.
- Spread a thin layer of paint across the smooth surface.
- Let the child draw lines or shapes through the wet paint with a finger or safe tool.
- Lay paper on top and press gently.
- Lift the paper to reveal the one-time print.
What children practice: Creative decision-making, mark-making, prediction, and observation.
8. Fold-and-Press Symmetry Printing
You need: Paper folded in half and small amounts of washable paint.
- Open the folded paper.
- Add a few small paint dots or short lines to one side.
- Fold the paper and press with a flat hand.
- Open it and compare the two sides.
What children practice: Same/different language, early symmetry awareness, prediction, and two-hand coordination.
9. DIY Roller Printing
You need: A small washable roller or sturdy cardboard tube, textured material, washable paint, and large paper.
- Add a simple texture around the roller or tube.
- Coat the raised surface lightly with paint.
- Roll across a large sheet of paper.
- Change direction and compare the tracks.
What children practice: Bilateral coordination, arm control, direction words, and pattern observation.
10. Cardboard Tube Shape Printing
You need: Clean cardboard tubes, washable paint, a tray, and paper.
- Leave one tube round.
- Gently pinch other tubes into an oval, heart, or simple triangle-like shape.
- Dip the edge into paint.
- Stamp and compare the outlines.
What children practice: Shape comparison, grip strength, spatial awareness, and repeated placement.
11. Toy Car Track Printing
You need: One or two washable toy cars with textured wheels, a shallow paint tray, and a long sheet of paper.
- Roll only the wheels through a thin layer of paint.
- Drive the car slowly across the paper.
- Try straight, curved, fast, and slow tracks.
- Compare the wheel patterns.
What children practice: Cause and effect, direction, controlled movement, and visual tracking.
Children who enjoy this idea may also like these transportation activities for preschoolers . For a no-paint follow-up, try the free Vehicles Pre-Writing Paths printable .
12. Recycled Texture Printing
You need: Clean, age-appropriate textured items such as corrugated cardboard, mesh secured to a larger backing, large jar lids, or egg-carton sections, plus washable paint and paper.
- Choose three materials with clearly different textures.
- Apply a small amount of paint to each surface.
- Press each item onto paper.
- Talk about which print looks bumpy, smooth, dotted, lined, or rough.
What children practice: Sensory comparison, descriptive vocabulary, classification, and experimentation.
If the child is especially interested in texture, continue with sensory activities for preschoolers .
What Skills Does Printmaking Build?
One simple printmaking setup can involve several kinds of learning at once. The Head Start Early Learning Outcomes Framework is not a printmaking standard, but it is a useful developmental framework because it treats learning domains as connected, including approaches to learning, cognition, and perceptual, motor, and physical development.
Fine Motor Control
Grasping a sponge, holding a block, pressing a stamp, and controlling a roller all require children to adjust force and hand position. These are useful hand-strength and coordination experiences, especially when adults choose tools that are large enough for the child to control successfully.
Hand-Eye Coordination
Children look at an open space, move the tool toward it, press, and check the result. Repeated printing gives immediate feedback without requiring precise pencil control.
Early Math Thinking
Patterns, shapes, position, repetition, symmetry, same/different, and size comparisons can all appear naturally during printing. Adults can add math language without turning art time into a worksheet.
Sensory Exploration
Different tools create different visual textures and require different pressure. Pairing printmaking with sensory vocabulary can help children notice and describe what they see and feel.
Creativity and Problem-Solving
Process-focused art can invite children to compare, predict, plan, and solve small problems. NAEYC describes these kinds of cognitive behaviors within open-ended art experiences, while Head Start’s framework highlights curiosity, initiative, and creativity within approaches to learning.
For another hands-on route into observing, testing, and changing an idea, see STEM activities for preschoolers .
How to Make Preschool Printmaking Easier
Use Less Paint Than You Think
A thick puddle can hide the texture children are trying to print. Start with a thin layer. If the mark looks too light, add a little more instead of beginning with too much.
Start With Large Tools
Large sponges, blocks, and cardboard tubes are easier for younger preschoolers to grasp and place. Smaller stamps can come later when children want more detail.
Offer Fewer Choices First
Two paint colors and two or three tools are usually enough for a first attempt. Extra choices can be added after the child understands how the materials work.
Comment on the Process, Not the Product
Instead of saying, “Make yours look like this,” describe what is happening: “You made three blue circles,” or ask, “What do you think will happen if you overlap the prints?” NAEYC recommends this kind of child-led, open-ended approach for process art.
A Low-Mess Printmaking Setup
Printmaking does not have to take over the room. A small setup also makes it easier for children to focus on the action instead of the number of materials.
- Cover only the work area, not the whole room.
- Use shallow trays with a thin layer of paint.
- Keep one damp cloth within adult reach.
- Set out only the tools needed for that activity.
- Prepare a drying spot before starting.
- Choose washable, age-appropriate art supplies.
Simple Printmaking Supplies
Most of these activities work with supplies already found at home or in a classroom. Optional tools can make cleanup or repeated use easier, but they are not required.
Things You May Already Have
- Paper or recycled paper bags
- Kitchen sponges
- Cardboard tubes
- Washable plastic blocks
- Leaves and safe natural materials
- Toy cars with washable wheels
Optional Supplies
- Washable tempera paint
- Shallow reusable paint trays
- Large foam shapes
- Child-size washable rollers
- Art smock or reusable table mat
- Heavyweight art paper
For families buying art supplies, the safest approach is to check the age guidance and full label rather than assuming that “washable” automatically means suitable for every child. The American Academy of Pediatrics provides a practical overview in Choosing Safe Art & Craft Supplies for Children .
Frequently Asked Questions About Printmaking Activities for Preschoolers
What age can children start printmaking?
Many simple printmaking activities can be introduced during the preschool years when the tools are large, the materials are age-appropriate, and an adult supervises. The 3+ and 4+ labels in this guide are starting points rather than milestones; adjust the activity for the individual child.
What paint is best for preschool printmaking?
Washable, water-based children’s paint is usually the easiest choice for home and classroom cleanup. Adults should still check the manufacturer’s age guidance and safety labeling and supervise use.
Is printmaking a fine motor activity?
Yes. Grasping tools, pressing, rolling, placing prints, and adjusting pressure all use hand and finger control. Printmaking can complement other preschool fine motor activities without replacing pencil, cutting, building, or everyday self-care practice.
How can printmaking be less messy?
Use a thin layer of paint in shallow trays, offer only a few tools, cover a small work area, and prepare a drying spot before children begin. Large tools are also easier to keep under control than many small stamps.
What can preschoolers use instead of store-bought stamps?
Large sponges, cardboard tubes, washable blocks, leaves, apples cut by an adult, bubble wrap, textured cardboard, and toy wheels can all make useful prints. Choose clean, safe materials that are large enough for the child to handle comfortably.
More Preschool Activities
Printmaking works well as one part of a broader hands-on learning routine. These related guides can extend the same skills without repeating the same activity:
About This Guide
This Nini Printables guide is designed for parents, preschool teachers, homeschool families, and caregivers choosing practical printmaking activities for preschoolers. The activities were editorially reviewed against four criteria: preschool-manageable tools, short directions, easy-to-source materials, and realistic cleanup and supervision. Suggested ages are starting points, not developmental milestones.
Broader teaching and safety statements are linked to the relevant professional or government guidance so readers can check the source directly. Learn more about the site’s purpose on the About Nini Printables page.
Teaching References
- Laurel Bongiorno. How Process-Focused Art Experiences Support Preschoolers . National Association for the Education of Young Children, Teaching Young Children, 2014.
- Office of Head Start. Head Start Early Learning Outcomes Framework: Ages Birth to Five .
- Sophie J. Balk, MD, FAAP, and Ruth A. Etzel, MD, PhD, FAAP. Choosing Safe Art & Craft Supplies for Children . American Academy of Pediatrics / HealthyChildren.