
15 Cutting Activities for Preschoolers: Easy Scissor Skills Practice
Start with simple snips, then build toward straight lines, curves, and basic shapes with low-prep cutting activities that fit short preschool practice sessions.
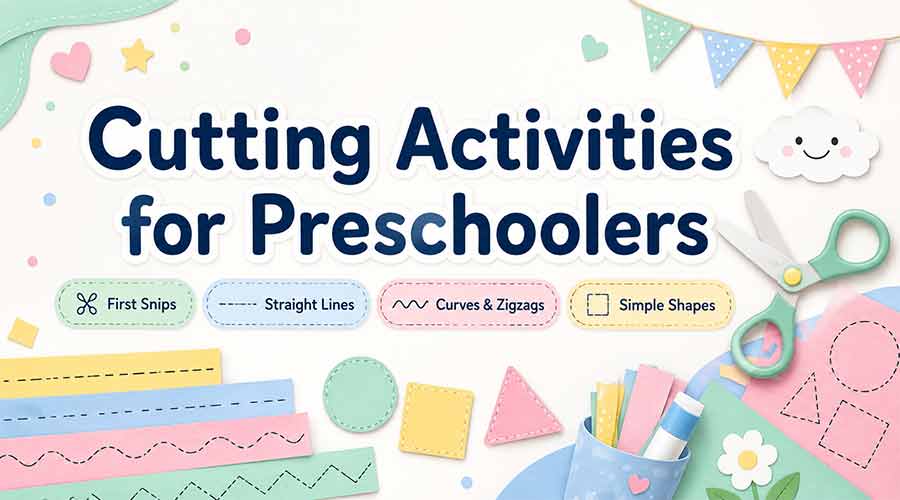
Quick Answer
Good cutting activities for preschoolers begin with short snips in easy-to-hold materials, then move to thick straight lines, gentle curves, zigzags, and simple shapes. Keep sessions short, use child-safe scissors, and choose the next activity by what the child can do comfortably—not by age alone.
Learning to use scissors asks a child to coordinate both hands at once: one hand opens and closes the scissors while the other holds and turns the material. That is why a small cutting task can feel surprisingly difficult at first.
The goal is not a perfectly cut line. Instead, give the child a clear next step that feels achievable. A preschooler who is still learning to snip needs a different activity from a child who can already follow a curved path.
This guide organizes preschool cutting activities from easiest to more challenging so parents, teachers, homeschool families, and caregivers can quickly choose an activity that matches the child’s current skill level.
Why Cutting Practice Helps Preschoolers
Cutting is one practical way to strengthen fine motor control because children must use their fingers, hands, wrists, eyes, and both sides of the body together. The National Association for the Education of Young Children includes cutting with child-safe scissors among everyday activities that help children practice fine motor skills.[2]
The Head Start Early Learning Outcomes Framework also describes a progression from cutting paper with scissors to cutting shapes and eventually cutting along a line with greater control.[1] In other words, it is normal for scissor skills to develop in steps rather than all at once.
Cutting practice can also support skills used in drawing, writing, dressing, puzzles, and other classroom tasks. For more ideas that work the hands in different ways, see these fine motor activities for preschoolers.
Before You Start: Choose the Right Cutting Level
Before choosing a craft or worksheet, watch what happens when the child makes a few cuts. Then start at the easiest level that still feels useful.
- Use child-safe scissors that fit the child’s hand.
- Show how the thumb points upward while cutting.
- Use larger paper pieces before tiny scraps.
- Start with bold paths instead of thin lines.
- Let the helper hand turn the paper.
- Stop before the activity becomes frustrating.
If a child is still building pencil control too, these pre-writing activities for preschoolers can be alternated with cutting practice instead of doing both in one long session.
Beginner Cutting Activities: Start With Snipping
For a true beginner, the easiest target is not “cut on the line.” It is simply learning to open and close the scissors while the other hand keeps the material steady.
1. Cut Playdough Snakes
You need: Playdough and child-safe scissors.
How to do it: Roll playdough into short, thick snakes. Let the child snip each snake into small pieces.
2. Snip Paper Strips
You need: Short strips of construction paper.
How to do it: Hold one end of a strip and invite the child to make small cuts along the opposite edge.
3. Snip Drinking Straws
You need: Wide paper straws or soft craft straws.
How to do it: Cut the straws into shorter sections, then use the pieces for sorting or collage work.
4. Give Paper a Haircut
You need: A paper strip or paper plate edge with simple drawn “hair.”
How to do it: Draw short vertical marks. The child snips toward each mark without needing to cut across the whole page.
Pair Scissor Practice With Other Fine Motor Work
Cutting is only one way to build hand control. Mix it with tracing, matching, and simple pre-writing so practice stays varied.
Straight-Line Cutting Activities
Once the child can make repeated snips, the next challenge is moving the scissors forward through the paper. Use short, thick paths before long or narrow lines.
5. Cut Short Thick Lines
You need: Index cards or small paper rectangles and a marker.
How to do it: Draw one bold line from the edge toward the middle. Stop the line before it reaches the other side.
6. Road Cutting Strips
You need: Paper strips and a dark marker.
How to do it: Draw a “road” with two wide parallel lines and let the child cut through the middle lane.
7. Sticker-to-Sticker Cutting Paths
You need: Paper, two stickers, and a marker.
How to do it: Place one sticker near the edge and one farther in. Draw a thick line connecting them, then cut from one sticker to the other.
8. Cut Scrap Paper for a Collage
You need: Colored paper scraps, glue, and one larger sheet.
How to do it: Cut scraps into smaller pieces, then glue them into a picture or pattern.
Curved and Zigzag Cutting Practice
Curves and corners add a new skill: the helper hand must rotate the paper while the cutting hand keeps a steady rhythm. If the child keeps turning the scissors instead of the paper, model the helper hand slowly.
9. Wavy Roads
You need: Wide paper strips and a marker.
How to do it: Draw one gentle wave with only two or three broad curves. Invite the child to cut along it.
10. Zigzag Paths
You need: Cardstock or construction paper and a marker.
How to do it: Draw a large zigzag with only a few corners. Pause at each corner and turn the paper before continuing.
11. Paper Plate Spiral
You need: A paper plate with a wide spiral drawn from the edge inward.
How to do it: Start the cut for the child if needed, then let the child follow the spiral while rotating the plate.
Simple Shape Cutting Activities
Shape cutting combines several skills at once, so start large. A big square or circle is more useful than a page full of tiny shapes.
12. Cut Large Circles
You need: Paper with one large, thick-outlined circle.
How to do it: Cut near the edge of the circle while the helper hand slowly turns the page.
13. Squares and Triangles
You need: Large outlined shapes.
How to do it: Cut one side at a time. Pause at each corner, turn the paper, and continue.
14. Shape Collage
You need: A few large circles, squares, and triangles plus glue.
How to do it: Cut the shapes, then combine them into a house, robot, vehicle, or abstract picture.
15. Cut-and-Match Picture Puzzle
You need: A simple picture or drawing divided by one or two bold lines.
How to do it: Cut on the lines, mix the pieces, then put the picture back together.
Want an Easy Shape Follow-Up?
After cutting large shapes, tracing those same shapes gives children another way to practice controlled hand movements without repeating the exact task.
What If My Preschooler Struggles With Scissors?
Difficulty usually becomes easier to solve when you look at the exact part of the task that is breaking down. Adjust one thing at a time rather than asking the child to “try harder.”
The scissors will not open again
Return to playdough or short paper snips. Slow down the open-close motion and use scissors that are easy for the child’s hand to operate.
The paper keeps folding or tearing
Use a smaller, slightly firmer piece of paper. A full floppy sheet asks the helper hand to control too much material.
The helper hand does not know what to do
Place a small sticker where the helper hand can hold the paper. Model how that hand moves and turns the page while the scissors point forward.
The child cannot stay on the line
Make the path wider and shorter. A thick road gives useful direction without demanding the precision of a narrow worksheet line.
The child turns the scissors sideways
Pause before a corner. Keep the cutting hand mostly in place and practice turning the paper with the other hand.
The activity becomes frustrating quickly
End after one successful strip or shape. Five useful minutes can build more confidence than finishing an entire page after interest is gone.
If hand use seems consistently difficult across many everyday tasks, or you have concerns about development, discuss those concerns with the child’s pediatrician or another qualified professional rather than using a worksheet as an assessment.
A Simple 5-Day Scissor Practice Routine
This short routine turns cutting activities for preschoolers into manageable daily practice instead of one long craft session. Aim for about 5–10 minutes and stop earlier when attention drops.
Repeat a level if it still feels challenging. There is no benefit in moving to tiny shapes just because the week is over.
Optional Supplies for Cutting Practice
You do not need a large craft kit for effective scissor activities for preschoolers. A few simple materials can support almost every idea in this guide.
A Small, Useful Supply List
- Child-safe scissors: Choose a size the child can open and close comfortably.
- Construction paper or cardstock: Slightly firmer paper can be easier for beginners to control.
- Washable markers: Use them to draw bold cutting paths.
- Glue sticks: Turn cut pieces into collages so the practice has a purpose.
- Playdough: Useful for low-pressure first snips.
- Stickers: Mark starts, stops, or simple destinations on cutting paths.
Keep purchases optional: Regular household paper and one suitable pair of scissors are enough to start.
When a Printable Cutting Activity Helps
These cutting activities for preschoolers work well without a worksheet, especially at the earliest snipping stage when following a printed line can add unnecessary pressure. Once a child understands how to open, close, and move the scissors forward, a simple printable can make practice easier to repeat.
A useful printable should show one clear task at a time, use bold paths, leave enough space for the scissors, and progress from easier lines to more complex turns. Avoid pages that place many tiny shapes close together for a beginner.
Until a dedicated cutting printable is added to Nini Printables, you can combine scissor work with the site’s existing Vehicles Pre-Writing Paths for visual path practice or the Preschool Shapes Tracing printable for shape familiarity.
Frequently Asked Questions About Cutting Activities for Preschoolers
What are good cutting activities for preschoolers?
Good cutting activities match the child’s current scissor skill. Beginners can snip playdough or paper strips. Next, try short straight lines, then gentle curves and zigzags, and finally large simple shapes. Activities work best when the material is easy to hold and the cutting path is clear.
How do I teach a preschooler to use scissors?
Start by showing the open-close motion with child-safe scissors. Keep the thumb pointing upward, let the other hand hold the material, and begin with a task that needs only a few snips. Once that motion is comfortable, add forward cutting and paper turning.
What should a beginner cut first?
Playdough and short paper strips are simple first choices because the child can focus on opening and closing the scissors. A beginner does not need to follow a thin line right away.
How can I make cutting practice easier?
Use smaller pieces of firmer paper, draw thick short paths, reduce the number of turns, and stop after a small success. If a full worksheet is frustrating, return to one strip or one shape.
Are cutting activities good for fine motor skills?
How long should preschool cutting practice last?
There is no required session length. For many children, a short 5–10 minute activity is enough. End sooner if the child becomes tired or frustrated, and repeat the same skill another day.
Keep Cutting Practice Simple
The most useful cutting activities for preschoolers match the child’s current scissor control rather than pushing toward smaller shapes too quickly. Start with snips, move to short lines, introduce curves when the helper hand can turn the paper, and save smaller shapes for later.
There is no need to finish a full page. A few successful cuts can be enough practice for one day—and they make it easier to come back tomorrow with confidence.
About This Guide
This Nini Printables guide is written for parents, preschool and kindergarten teachers, homeschool families, and caregivers looking for practical early-learning activities. The skill progression is aligned with public early-childhood guidance that describes increasing control with scissors from cutting paper to shapes and lines.[1] It is educational content, not a developmental assessment.
Learn more about the site on the Nini Printables About page.
Teaching References
Source note: This guide relies on government and professional early-childhood guidance rather than peer-reviewed journal studies. The sources below do not provide DOI identifiers, so no DOI is applicable.
- Head Start. Perceptual Preschool: Fine Motor Development. U.S. Department of Health and Human Services. Used for the progression from cutting paper to shapes and cutting along a line. No DOI applicable.
- National Association for the Education of Young Children (NAEYC). Help Your Child Build Fine Motor Skills. Used for child-safe scissors and everyday fine-motor practice. No DOI applicable.
- American Academy of Pediatrics / HealthyChildren.org. Hand and Finger Skills of Your Preschooler. Used for preschool hand control and cutting with safety scissors. No DOI applicable.