
Construction Activities for Preschoolers: 15 Build, Test, Change & Explain Challenges
These construction activities for preschoolers turn blocks, cups, cardboard, paper and toy vehicles into small building problems children can actually solve. Instead of stopping when a structure is finished, each idea invites ages 3–5 to build it, test it, change one thing and explain what happened.
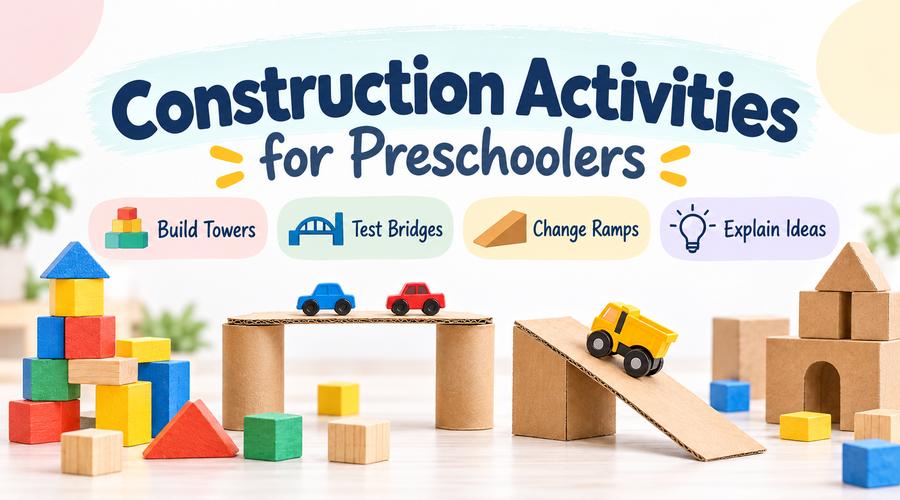
Make something with a clear job: hold, span, fit, stand or carry.
See what the structure actually does instead of judging how it looks.
Adjust one part, material or support and try the same test again.
Use one simple question so the child can describe what changed.
Construction play works best when the adult does not rush in to fix every wobble. A tower that falls, a doorway that is too narrow or a bridge that bends gives the child a useful problem to notice. NAEYC describes preschool engineering experiences as opportunities to tinker, build, test and revise rather than follow one perfect sequence.[1]
This guide stays intentionally narrow. It is about building activities for preschoolers and early engineering—not a general craft roundup, a construction worksheet page or a full preschool STEM curriculum. For broader science, technology, engineering and math ideas, use STEM Activities for Preschoolers.
Pick a Construction Activity by the Problem You Want to Solve
You do not need all 15 ideas at once. Choose a build that matches the time, materials and kind of thinking you want today.
What Preschoolers Learn When a Building Has a Job
Building becomes more useful when children have a reason to compare one design with another. NAEYC notes that block play can support authentic problem-solving and shows how a child may redesign a falling tower by changing its base to improve stability.[2] Head Start likewise frames preschool engineering around noticing a problem, thinking about solutions, making something and improving the design.[3]
Children can compare wide and narrow bases, tall and short structures, or different support positions.
Words such as under, over, beside, across, wider and taller have an immediate purpose during building.
A failed test becomes information: something can be moved, strengthened, shortened or rebuilt.
Short questions such as “What changed?” encourage children to describe what they noticed in their own words.
If your goal is specifically shape recognition rather than construction, use Shape Activities for Preschoolers. That keeps the learning goal clear instead of turning every building task into a shapes lesson.
Use One Simple Engineering Loop: Build → Test → Change → Explain
You do not need engineering vocabulary during every turn. The routine is useful because it keeps adults from taking over the build and gives children a repeatable way to respond when something does not work yet.
Give the structure one clear job. “Can you make a garage this truck can enter?” is easier to act on than “Build something cool.”
Use a simple test: stand for five seconds, hold one toy, span one gap, let one vehicle pass or fit one object inside.
Invite one adjustment instead of rebuilding for the child. Try a wider base, another support, a different material or a shorter span.
Ask one question: “What did you change?” “What stayed up?” “What made more room?” or “What will you try next?”
NAEYC’s preschool design-challenge guidance uses a similar iterative pattern: think, build, try, revise and share, while recognizing that young children may move back and forth rather than follow steps in a strict order.[1]
15 Construction and Building Activities for Preschoolers
Most of these activities use blocks, paper cups, cardboard, tape and toy vehicles. Set out only what the child needs for the current problem; a smaller material choice often makes it easier to notice what each change does.
Build a Garage That Fits a Construction Truck
Choose one toy dump truck, excavator or other sturdy vehicle. The challenge is to make a garage with walls and an opening the vehicle can actually use.
Make two walls and a top, or create an open garage with blocks or cups.
Drive the vehicle in without lifting the structure.
Move a wall, widen the doorway or raise the top if the truck does not fit.
“What did you change so the truck had more room?”
Build a Wide-Base Tower
Start with a normal tower and let it get as tall as the child wants. If it falls, the next build has one new rule: begin with a base that uses more than one block.
Make one tower with a narrow base.
Notice how long it stands or how tall it gets before wobbling.
Build again with a wider base while keeping the same block set.
“Which base helped the tower stand? What did you notice?”
NAEYC uses this kind of falling-tower redesign as an example of authentic engineering problem-solving in block play.[2]
Build a Cup Wall With a Doorway
Paper cups make a lightweight wall that shows changes immediately. Add a doorway for a toy worker or vehicle so the wall has a function beyond standing up.
Stack cups into a low wall and leave one opening.
Can the toy pass through while the rest of the wall stays standing?
Make the opening wider or change the cups around it.
“How did you keep the doorway open without losing the whole wall?”
Make a Cardboard Building That Stands by Itself
Use a small box, cereal-box cardboard or folded cardstock. The goal is not a decorated model; the goal is a simple building that can stand and has a usable entrance.
Fold or tape cardboard into a freestanding shape. Adults handle any difficult cutting.
Place it on the floor and check whether a small toy can enter.
Fold a flap, add a brace or move the entrance if the structure tips or blocks the toy.
“What helped your building stay up?”
Build a Bridge for a Dump Truck
Place two books, blocks or low boxes a short distance apart and call the space between them a river or work-zone gap. The truck needs a way across.
Create a bridge deck with sturdy cardboard and supports.
Drive one toy truck across slowly.
Add or move a support if the middle bends, tips or slides.
“Where did the bridge need more help?”
Make a Construction Vehicle Loading Ramp
Lean a strip of sturdy cardboard on one or two blocks. Roll the same toy vehicle from the top and compare what happens when the ramp starts higher or lower.
Make one low ramp with a clear start and stop area.
Release the vehicle without pushing it hard.
Raise or lower one end and try again.
“What changed when the ramp was higher?”
For a broader vehicle-and-ramp theme, continue with Transportation Activities for Preschoolers.
Build a Road Across a Gap
Choose two places a toy vehicle needs to connect—such as a garage and a block building—and place one obstacle between them. The road must reach both places without moving the obstacle.
Mark a road with painter’s tape, craft paper or flat blocks.
Drive the vehicle from start to finish.
Move one road section, add a turn or bridge the obstacle.
“Why did you put the road there?”
Want More Hands-On Learning After the Build?
If the child wants another engineering problem, continue with the broader STEM Activities for Preschoolers guide. If you need a quieter follow-up for table time, browse the current free preschool printables instead of forcing a second hands-on activity.
Change the Material, Support or Plan
The next challenges make comparison more visible. Keep the task the same while changing one part, so the child has a reason to notice cause and effect.
Flat Paper vs. Folded Paper Beam
Use two blocks or cups as supports and one sheet of paper as the span. First lay the paper flat. Then fold another sheet lengthwise into a simple ridge or accordion-like shape and compare.
Span the same gap with flat paper.
Place one lightweight toy or eraser near the middle.
Fold the paper and repeat the same test over the same gap.
“The paper is still paper. What changed about its shape?”
Add One Support to Make a Roof Stronger
Make a small roof or platform resting on two supports. If the middle bends or wobbles, offer one extra block as a possible support rather than telling the child exactly where it belongs.
Create a simple platform with support at both ends.
Place one lightweight object on top.
Add one support somewhere under the platform and test again.
“Where did you put the new support, and what happened?”
Rebuild a Block Wall After a Gentle Test
Build a short wall, then use the same gentle test each time—for example, roll a soft ball slowly toward it from the same spot. The goal is not to create an indestructible wall; it is to compare two arrangements.
Make the first wall with a small set of blocks.
Use one consistent, gentle test.
Rearrange the same blocks and repeat.
“Which wall stayed together longer? What was different?”
Build the Same Job With a Different Material
Pick one job—hold a small toy off the floor, make a garage wall or create a short tower. Build it once with blocks, then try again with paper cups or cardboard tubes.
Complete the job with material A.
Use the same simple test both times.
Switch to material B without changing the job.
“Which material was easier to use for this job? Why?”
Draw a Simple Blueprint, Then Build It
A preschool blueprint does not need measurements or architectural detail. A few lines for walls, one opening and a roof mark are enough to make planning visible before building begins.
First draw a very simple plan, then use blocks, cups or cardboard to interpret it.
Check one planned feature: entrance, roof, wall or room for a toy.
Revise either the drawing or the structure when the plan and build do not match.
“What did you keep from your plan, and what did you change?”
Copy a Small Structure, Then Change One Part
Build a tiny model with four to six pieces and let the child recreate it beside yours. Once the copy is close enough, invite one deliberate change instead of correcting every difference.
Recreate the small model from the same or similar pieces.
Look at both from the same side and notice what matches.
Move, replace or add one piece to make a new version.
“What did you change from the first design?”
Build a Small Neighborhood Together
Give two to four children—or one adult and one child—a shared floor space. Each person builds one part, such as a home, garage, road or bridge, and the pieces need to connect into one neighborhood.
Choose who will make each part and place the first structures.
Can a toy person or vehicle move between the parts?
Move one structure, road or bridge so the neighborhood works better as a whole.
“What did your group change so the pieces connected?”
For more teacher-friendly group formats, see Small Group Activities for Preschoolers.
The Fix-It Construction Challenge
Return to something that did not work the first time: a falling tower, narrow garage, weak bridge, wobbly wall or ramp that did not behave as expected. This is the activity where “not yet” becomes the point.
Recreate the original problem or use the structure that is already there.
Repeat the same test once so the problem is easy to see.
Let the child choose one change and test again. Repeat only while interest lasts.
“What did you change, and what happened after you changed it?”
If building itself becomes frustrating because the child mainly needs easier grasping, placing or tool practice, step sideways to Fine Motor Activities for Preschoolers rather than making the construction challenge harder.
Adjust Construction Activities for Ages 3, 4 and 5
Age can help you choose a starting point, but it should not become a pass/fail checklist. Use the child’s current interest, language and comfort with the materials to simplify or extend the challenge.
Use fewer pieces, larger materials and one visible problem. Let the child build, touch, choose and notice. Adult questions can be very short: “Fit?” “Stand?” “What changed?”
Add simple prediction and comparison. Ask which support might help, which opening is wider or what might happen if the ramp gets higher.
Invite a quick sketch, a second test or a longer explanation. Children who enjoy the challenge can keep one variable the same while changing another.
A Simple 5-Day Preschool Construction Week
For a classroom, homeschool week or recurring center, use one idea each day instead of setting out every material at once.
Truck Garage or Cardboard Building. Focus on the structure’s job.
Wide-Base Tower. Compare what helps a structure stand.
Bridge or Loading Ramp. Test a vehicle on the structure.
Swap one material or add one support and compare again.
Return to one earlier problem, improve it and talk about the change.
Optional Supplies That Make Building Play Easier to Repeat
You can do most of these preschool building activities with what you already have. If you are refreshing a classroom shelf or home activity bin, prioritize a few materials that can be reused across many challenges rather than buying a separate kit for every idea.
Wooden blocks, large plastic blocks or other age-appropriate pieces that are easy to stack and rearrange.
Paper cups, cardboard tubes, cardstock, small boxes and sturdy recycled cardboard.
Painter’s tape, washable markers and a few sturdy toy construction vehicles for tests that involve fit, roads or ramps.
Buying tip: you do not need a themed construction kit for these activities. If you add new supplies, choose open-ended, durable, age-appropriate pieces that can be reused for towers, bridges, roads, pretend play and other preschool themes.
Keep Preschool Construction Play Simple and Safe
These activities are designed around lightweight, familiar materials rather than real construction tools. The U.S. Consumer Product Safety Commission recommends choosing art and craft materials intended for children, reading labels and providing direct adult supervision.[4]
- Build on a stable floor or table, not on stairs or walkways.
- Use lightweight materials for towers, walls and overhead pieces.
- Adults handle difficult cardboard cutting or other tasks that require sharp tools.
- Use child-intended, non-toxic art materials and follow product labels.
- Skip small loose parts when a child still mouths objects.
- Stop a test if the activity turns into throwing, climbing or crashing heavy objects.
Construction Activities for Preschoolers: FAQ
What are good construction activities for preschoolers?
Useful construction activities give the structure a simple job. Try building a garage that fits a truck, a tower with a wider base, a bridge that holds one toy, a road around an obstacle or a wall that can be rebuilt after a gentle test. The best next step is usually to change one thing and try again.
What do preschoolers learn from building activities?
Building play can support spatial language, comparison, planning, stability and balance ideas, problem-solving and explanation. The learning becomes easier to see when adults ask children to test a structure and talk about what they changed rather than focusing only on the finished model.
What construction activities can I do without special toys?
Paper cups, cardboard, small boxes, cardstock, painter’s tape and a few household-safe objects are enough for many building challenges. A toy vehicle is helpful for garage, bridge and ramp tests, but it is not required for most of the ideas in this guide.
How do you turn block play into an engineering activity?
Give the build a problem to solve, then use a simple loop: Build → Test → Change → Explain. For example, ask a child to make a tower stand, test it, change the base and explain what happened. The activity can stay playful while still including engineering thinking.
Are construction activities suitable for 3-year-olds?
Yes, when the challenge is simple and the materials are large, lightweight and familiar. A 3-year-old may focus on fitting, stacking and noticing what happens, while an older preschooler may enjoy planning, comparing two versions or explaining why a change worked.
Keep the Next Activity Easy to Choose
After a hands-on build, the next useful activity may be more building—or it may be a quieter table task. Browse Nini Printables for free preschool resources, or use the related guides below to stay with the skill your child is already enjoying.
If this guide was useful, sharing it with another parent, caregiver or preschool teacher helps more families find the free learning resources on Nini Printables.
About This Guide
This article was prepared for Nini Printables to help parents, caregivers, homeschool families and preschool educators turn a familiar construction theme into practical, low-prep building problems for ages 3–5. Each activity was selected for a clear build goal, a simple test and an adjustment a child can see or feel. The activities are adaptable play ideas, not developmental tests, classroom-tested claims or guaranteed outcomes.
The core Build → Test → Change → Explain structure is informed by early-childhood engineering guidance from Head Start and NAEYC. The article deliberately keeps broad STEM, transportation, shapes, fine-motor and printable worksheet intents on their existing or future dedicated pages so each resource has a clear purpose.
Teaching References
- NAEYC — Build It! Activities to Stretch Children’s Understanding of STEM Concepts. Describes preschool design challenges that include tinkering, building, testing, revising and sharing.
- NAEYC — Using Blocks to Develop 21st Century Skills. Includes an example of a preschooler redesigning a tower and changing the base to improve stability.
- Head Start — Exploring Engineering with Preschoolers. Provides early-childhood guidance for introducing engineering through problem-solving and design experiences.
- U.S. Consumer Product Safety Commission — Art and Craft Safety Guide. Guidance on selecting child-intended materials, reading labels and supervising children.